• Skip to main content
  • Skip to primary sidebar
  • Skip to footer

  • Home
  • About
  • Shop
    • Purchase and Delivery Policy
  • Gallery
  • Blog
    • Instagram
  • Tutorials
  • Contact
  • 0 items$0.00

15 How to carve into clay in Jingdezhen

April 26, 2017 by Deanna Roberts Leave a Comment

How to carve into clay in Jingdezhen (1)

Carving – Chen Min – Sculpture Factory, Jingdezhen © Deanna Roberts 2017

Learning to throw on a potter’s wheel and learning how to create amazing sculptures from clay is one thing… learning to carve into it is another thing all together.  That’s why a trip overseas is so worthwhile so that you can learn how to carve into clay in Jingdezhen.  It is the porcelain capital after all and where all the masters of this incredible artistry work and live and breathe ceramics.  It is the mecca for ceramic artists and is the place to visit to learn about its history and those skills and mastery have been handed down from generation to generation, over thousands of years.

So, if you’re a visiting artist in Jingdezhen, be sure to capitalise on the opportunity to take up a carving lesson.  One of the best in the business, one of the masters, is Chen Min.  Her carving skills are amazing and her talents are beyond measure.  The beauty of Chen Min’s teaching is that she is so patient, so endearing and so skilfull.  She’ll work with you, show you every little detail and even provide you with your own set of tools, handcrafted and sharpened by her own hand.

How to carve into clay in Jingdezhen (3)

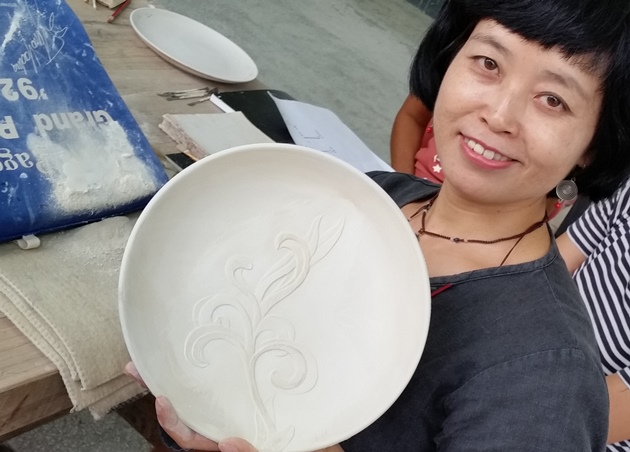
Chen Min and her beautiful work © Deanna Roberts 2017

Here are the basics:

  • Create a ceramic piece so that it’s bone dry
  • Select your design
  • Draw your design on to your piece in pencil

How to carve into clay in Jingdezhen (2)

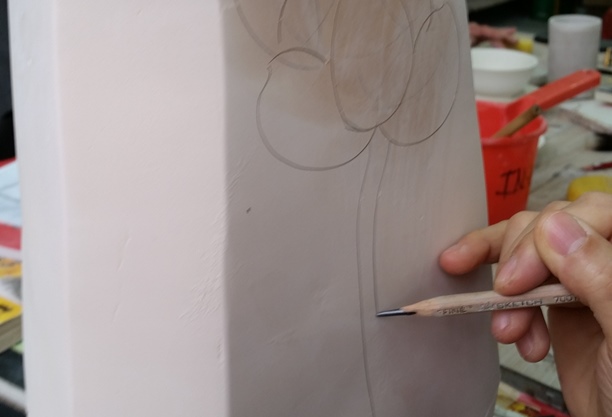
Draw your design first © Deanna Roberts 2017

  • Using a narrow carving tool start to carve around the edges
  • Using a wider carving tool carve around the outside to slowly taper the edges into the rest of the piece

How to carve into clay in Jingdezhen (4)

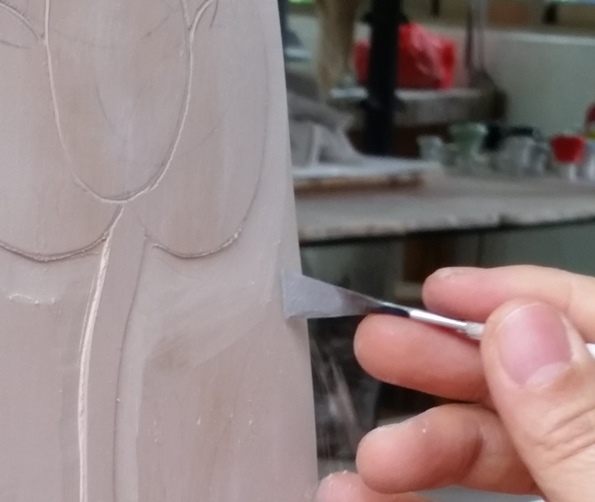
Use your wider tool © Deanna Roberts 2017

  • Use a razor blade (carefully…) to shave off any excess and level out the surface
  • Carve the inside edges of your design

How to carve into clay in Jingdezhen (5)

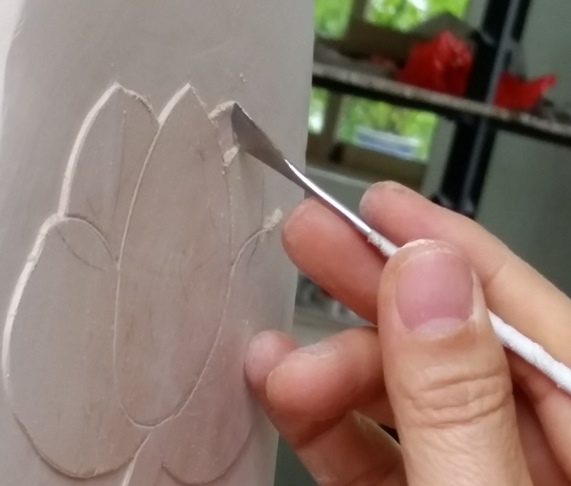
Carving the inside of the design © Deanna Roberts 2017

  • Dust as you go (those big bushy brushes you can buy in Jingdezhen are the best!)
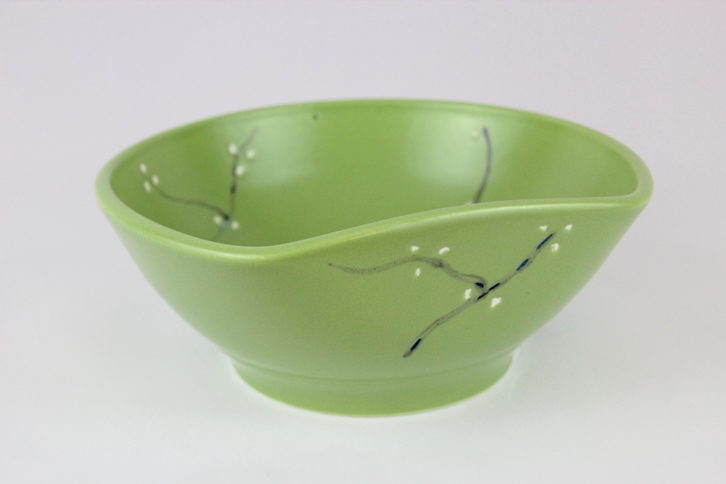
  • Bisque fire your piece and/or glaze your piece (celadon glazes are the best to show off your design) and fire it accordingly
  • Brag yourself silly 🙂

Take the time to pop into Chen Min’s studio in The Sculpture Factory too – she’s so accommodating and will no doubt share a pot of green tea with you and show you her work and probably that of her apprentice too.

How to carve into clay in Jingdezhen (7)

Chen Min’s studio desk © Deanna Roberts 2017

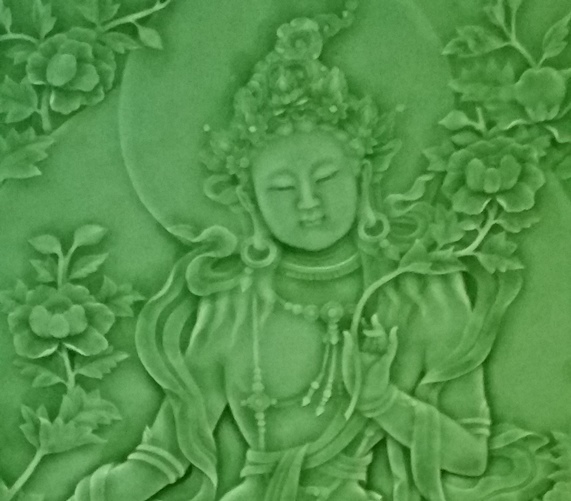
Travel around Jingdezhen as much as possible and check out some of the carving at the Ancient Kiln Museum and at the Fake Antiques Market too – the work there is simply mind blowing.  Many of the larger pots are thrown on the wheel by the big-pot throwers and the walls left thick so there’s something to carve into.  The patience and pain-staking work involved is astounding.

How to carve into clay in Jingdezhen (8)

Ancient Kiln Museum artist at work © Deanna Roberts 2017

How to carve into clay in Jingdezhen (9)

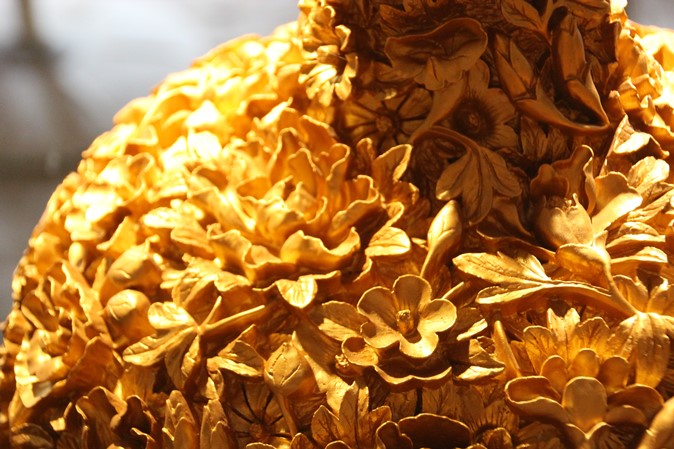
Carved porcelain at the Ancient Kiln Museum © Deanna Roberts 2017

Filed Under: How to, Jingdezhen Tagged With: carving, how to carve into clay, how to carve porcelain, jingdezhen, porcelain

14 How to make decorative tableware

April 16, 2017 by Deanna Roberts Leave a Comment

Ok, so this is a break from the normal Jingdezhen travel tales, but essential I feel!  As it happens I was sent an image of a piece of tableware with a cherry blossom design and at the time happened to be selecting a cherry blossom image for a Spring edition newsletter I was writing for an aged care facility.  The way things work out huh?  I know…so here’s one way you can learn how to make decorative tableware.

Anyway, so came about this Blossom Series of tableware that was an unforeseen success due to the wrong glazes being used.  The idea was to use a clear glaze over a copper rust glaze but instead of using the clear glaze I grabbed the White Glaze bucket instead and the results were fabulous.

Blossom series jug - (9) 12 x 9 x 13.5 H (excl handle) - Deanna Roberts
Blossom series - (6) 14 x 7 cm H - Deanna Roberts
Blossom series - (3) - Deanna Roberts
Blossom series - (3) Bowl - 12.5 x 10 x 9.5 cm H - Deanna Roberts
Blossom series bowl (2) - Deanna Roberts

The next test was on the marketplace, the people, the pottery addicts, the fans and the admirers who attend the annual Pottery Expo at Warrandyte, here in Melbourne.  Well… to keep it short – sold out!  Good thing I was able to repeat the success.

Here are a couple of links to two of the finished items: Cherry Blossom Bowl and Blossom Vessel.    You can view more in my Shop.

Here’s the drill:

  1. Throw your pots
  2. Trim/turn your pots to the desired shape
  3. Carve in your desired pattern into the side of your pot and paint in your slip mix
  4. When dry, scrape back the excess to reveal a lovely clean line
  5. Bisque fire your pots to 1000 deg C
  6. Glaze the pots as desired, then using a sharp tool, scratch out the ‘blossom’ petals
  7. Fire to 1280 deg C oxidation, electric kiln or gas 1340 deg C
  8. Voila!

Here’s the visual version:


So have a go, it’s easy enough, but time consuming.  It does require patience and a bit of testing in your own kiln, own glazes etc but it’s worth it.

To purchase the items, please visit my Shop to view more wonderful creations!

Filed Under: How to Tagged With: carving, etsy, how to carve stoneware, how to make functional tableware, jingdezhen, porcelain, stoneware

Primary Sidebar

Cart

LET’S GET SOCIAL

  • Facebook
  • Instagram
  • Pinterest
  • Twitter

From the Journal

Flourless Fudgy Avocado Brownies

By Deanna Roberts

What is PayID?

By Deanna Roberts

Fabric & Sewing Acronyms – WT do they mean?

By Deanna Roberts

Website image - pottery split-leg aprons 1

Why everyone needs a split-leg apron

By Deanna Roberts

How to organise a market stall (1)

19 How to organise a market stall

By Deanna Roberts

How to write an artist statement 2 - Deanna Roberts

18 How to write an artist statement

By Deanna Roberts

A GREAT READ!

The Porcelain Thief

Journal

STAY UP TO DATE

Privacy Policy | Terms & Conditions

Footer

Recent reviews

  • General Store Split-leg Apron 77 x 88 Crossover back - Deanna Roberts Studio General Store Split-leg Apron 77 x 88 with Crossover back
    Rated 5 out of 5
    by Tess Lynch
  • Country Fare Split-leg Apron 73 x 88 with Crossover Back ties - Deanna Roberts Studio Country Fare Split-leg Apron 73 x 88 with Crossover Back ties
    Rated 5 out of 5
    by Tess Lynch
  • Geyer Green Split-leg apron 79 x 87 with adjustable neck strap & waist ties - Deanna Roberts Studio Geyer Green Split-leg apron 79 x 87 with adjustable neck strap & waist ties & wide front overlap
    Rated 5 out of 5
    by Jane
  • Deer Spot Split-leg apron (79 x 88) with adjustable neck strap & waist ties - Deanna Roberts Studio Split-leg apron - Deer Spot (79 x 88) with adjustable neck strap & waist ties
    Rated 5 out of 5
    by Jodie
  • Das-Stile-Pottery-Ribbon.Carving-tool Das Stile Pottery Sculpting/Ribbon tool No. 8
    Rated 5 out of 5
    by Anonymous
  • Spicy Latte Split-leg apron (76 x 86) Crossover back - Deanna Roberts Studio Split-leg apron - Spicy Latte Split-leg apron (76 x 86) Crossover back
    Rated 4 out of 5
    by Anonymous
  • Shoe Fetish Split-leg apron (80 x 90) - Deanna Roberts Studio Split-leg apron - Shoe Fetish (80 x 90) with adjustable neck strap
    Rated 5 out of 5
    by Leisa T.
  • Jazz Split-leg apron (79 x 89) with Crossover back - Deanna Ro berts Studio Split-leg apron - Jazz (79 x 89) with Crossover back
    Rated 5 out of 5
    by Veronique
  • Stages of Clay 1 pager 6 Stages of Clay Chart
    Rated 4 out of 5
    by Elizabeth B.
  • Aspar Split-leg apron (88 x 80) with adjustable neck strap & waist ties - Deanna Roberts Studio Split-leg apron - Aspar (80 x 88) with adjustable neck strap & waist ties (water resistant)
    Rated 4 out of 5
    by Elizabeth B.

STAY UP TO DATE WITH NEWS & SPECIAL OFFERS

Privacy Policy | Terms & Conditions

From the Journal

Flourless Fudgy Avocado Brownies

By Deanna Roberts

What is PayID?

By Deanna Roberts

Fabric & Sewing Acronyms – WT do they mean?

By Deanna Roberts

  • Facebook
  • Instagram
  • Pinterest
  • Privacy Policy | Terms & Conditions
  • Purchase and Delivery Policy
  • Subscribe

Copyright ©2019 · Deanna Roberts - All Rights Reserved