• Skip to main content
  • Skip to primary sidebar
  • Skip to footer

Deanna Roberts Studio

For the creator in you

  • Home
  • About
    • Gallery
  • Shop
    • Aprons
      • Split-leg Aprons SOLD
    • Books & Downloads
    • Gift Cards & Coupons
    • Merchandise
    • Pottery tools
    • Supplies
    • Golf
    • Purchase, Delivery & Returns Policy
  • Blog
  • Tutorials
  • Recipes
  • Contact
  • 0 items$0.00

How to mix plaster and make a mold

November 23, 2023 by Deanna Roberts Leave a Comment

Mixing-plaster-Deanna-Roberts-Studio

Mixing plaster bucket - Deanna Roberts StudioFirst things first – get yourself a clean bucket – if the bucket is a bit gritty or dirty then this will leave little marks or dimples in your plaster.

  1. Work out how much water/plaster you’ll require. (Ratio of water:plaster is 1.3 water:1 plaster – for example, 5kg of water will require 6.5 kg of plaster)
  2. Weigh your water in the bucket and tare the scales with the bucket first – 1 litre = 1 kg.
  3. Weigh your plaster
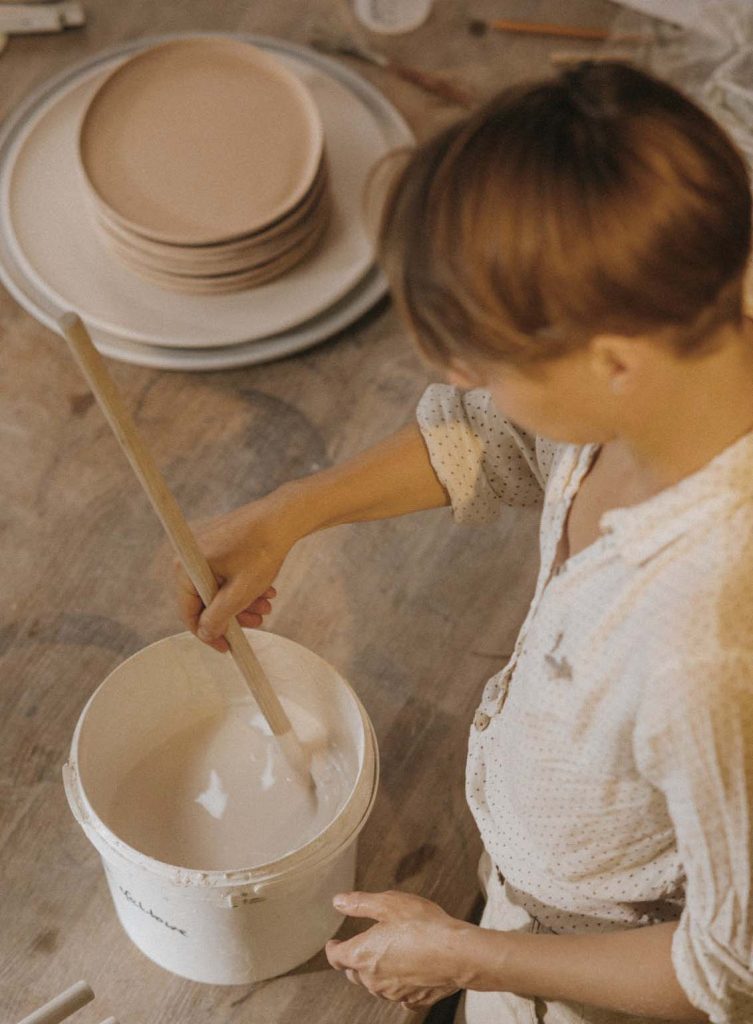
  4. Gradually add plaster to the water in the bucket (never add water to plaster – always plaster to water to prevent lumps) allowing the plaster to slake down – this will only take a few minutes
  5. Immerse your hand in the bucket mix and stir gently – any rapid stirring will create bubbles and air into your plaster mix. You can also use a long spoon to mix however using your hand is better so that you can feel and squash any lumps in the process.
  6. Continue to stir until your mixture begins to resemble thickened cream – this will take another few minutes.
  7. Rotate your bucket backwards and forwards to bring any air bubbles to the surface and tap the sides of the bucket too if necessary.
  8. Spray the surface of your plaster mix with a 50/50 mix of methylated spirits and water to remove any surface air bubbles – or use a spoon to lift any bubbles off the top.
Mixing Plaster - Deanna Roberts Studio

To make a plaster mold

  1. Prepare your item to be cast by placing a mold frame around your item. Paint any plastic surfaces, eg if the mold frame is plastic, the bench top, a plastic model etc, with a 80:20 Water to dish detergent mix (this will prevent the plaster sticking)
  2. Plug any areas around your mold frame with clay to prevent any plaster running out from underneath or through the sides of your frame.
  3. Pour the plaster mix slowly over your model and into the frame ensuring your model is covered by at least 2.5cm
  4. Stir the plaster with a soft brush or narrow wooden tool, eg a chopstick or wooden spoon to ensure the plaster fills every nook and cranny
  5. Tape the sides of your mold gently to bring any air bubbles to the surface and spray with your methylated spirits/water mix
  6. Clean up by washing out your bucket and any tools immediately to prevent the plaster setting
  7. Leave your mold until the plaster sets – you’ll be able to gently touch the surface and feel it get a bit warmer as it sets after which you can remove the mold
  8. Turn your mold over and gently remove any clay and then the mold frame/base board
  9. Clean any edges of your newly created plaster mold with wet and dry sandpaper or a rasp
  10. Allow the mold to try completely – this can take a number of weeks depending on your climate. Your mold will be ready to use when it is completely dry.

Filed Under: How to Tagged With: how to make a plaster mold, mixing plaster

Primary Sidebar

Cart

News

Pottery supplies in Australia - Deanna Roberts Studio

Where to find pottery supplies in Australia

By Deanna Roberts

Mixing-plaster-Deanna-Roberts-Studio

How to mix plaster and make a mold

By Deanna Roberts

Deanna Roberts Studio Split-Leg aprons

Why everyone should own a split-leg apron

By Deanna Roberts

Display - Deanna Roberts Studio - How to set up a market stall

How to set up a market stall

By Deanna Roberts

How to write an artist statement 2 - Deanna Roberts

How to write an artist statement

By Deanna Roberts

Transformers at timber yard and gallery - San Bao, Jingdezhen - Deanna Roberts

Transformers in San Bao?

By Deanna Roberts

Recent reviews

  • Choc Mint Split-leg apron 75cm x 91cm with adjustable neck strap - Deanna Roberts Studio Choc Mint Split-leg apron 75cm x 91cm with adjustable neck strap
    Rated 5 out of 5
    by Michelle Lykokapis
  • Orange Storm Split-leg apron 78 x 88 with adjustable neck strap & waist ties - Deanna Roberts Studio Orange Storm Split-leg apron 78 x 88 with adjustable neck strap & waist ties
    Rated 5 out of 5
    by Glen Wardle
  • Brigida Split-leg apron 75 x 88 with adjustable neck strap - Deanna Roberts Studio (6) Brigida Split-leg apron 75 x 88 with adjustable neck strap
    Rated 5 out of 5
    by Brigida Sanchez

A GREAT READ!

The Porcelain Thief

Product categories

  • Aprons
    • Split-leg apron DIY kits (coming soon!)
    • Split-leg Aprons
    • Children's aprons
    • Split-leg Aprons SOLD
    • Supplies
      • Clips & Buckles
      • Fabric
      • Tapes
  • Merchandise
  • Golf
    • Golf Printable Downloads
    • Golf Accessories
    • Golf earrings
  • Pottery tools
    • Tool storage
    • Art Sponges
    • Plastic scrapers
    • Wheel covers
    • Bag ties
    • Sanding tools/Whet Stones
  • Books & Downloads
    • Digital Prints
  • Gift Cards & Coupons
  • Uncategorised
  • Business Card Holders

RSS RSS Feed

  • Where to find pottery supplies in Australia
    Finding the right pottery supplies can be a challenge, especially in a vast country like Australia. Sourcing locally not only supports Aussie businesses but also ensures you get the best quality materials without the hassle of international shipping and customs. Whether you’re a beginner or a seasoned potter, having access to a wide range of […]
  • How to mix plaster and make a mold
    First things first – get yourself a clean bucket – if the bucket is a bit gritty or dirty then this will leave little marks or dimples in your plaster. To make a plaster mold The post How to mix plaster and make a mold first appeared on Deanna Roberts Studio.
  • Why everyone should own a split-leg apron
    When I first saw some fellow artists wearing split-leg aprons I sought out various fabrics that would suit my own design and began to search for high quality fabric offcuts from industry, deceased estates and private collections for their hard-wearing, durability and endurance qualities. It’s a great way to reduce, reuse and recycle and my […]

Footer

JOIN US ON SOCIALS

  • Etsy
  • Facebook
  • Instagram
  • Pinterest
  • YouTube

SUBSCRIBE

Deanna Roberts Subscribers

Recent reviews

  • Choc Mint Split-leg apron 75cm x 91cm with adjustable neck strap - Deanna Roberts Studio Choc Mint Split-leg apron 75cm x 91cm with adjustable neck strap
    Rated 5 out of 5
    by Michelle Lykokapis
  • Orange Storm Split-leg apron 78 x 88 with adjustable neck strap & waist ties - Deanna Roberts Studio Orange Storm Split-leg apron 78 x 88 with adjustable neck strap & waist ties
    Rated 5 out of 5
    by Glen Wardle
  • Brigida Split-leg apron 75 x 88 with adjustable neck strap - Deanna Roberts Studio (6) Brigida Split-leg apron 75 x 88 with adjustable neck strap
    Rated 5 out of 5
    by Brigida Sanchez
  • Ivory Stone Split-leg apron 75 x 90 with adjustable neck strap - Deanna Roberts Studio Ivory Stone Split-leg apron 75 x 90 with adjustable neck strap
    Rated 5 out of 5
    by Vicki
  • Denim Sands Split-leg apron 77 x 90 with adjustable neck strap - Deanna Roberts Studio Denim Sands Split-leg apron 77 x 90 with adjustable neck strap
    Rated 5 out of 5
    by Magdalena Teague
  • Parakeet Split-leg apron 77 x 89 with adjustable neck strap & Towel loop - Deanna Roberts Studio Parakeet Split-leg apron 77 x 89 with adjustable neck strap & Towel loop
    Rated 5 out of 5
    by Kim Johnston Ceramics
  • Poppy Split-leg apron 77 x 88 with crossover back ties - Deanna Roberts Studio Poppy Split-leg apron 77 x 88 with crossover back ties
    Rated 4 out of 5
    by Natalie D.
  • Cameron Tradie Split-leg Apron (79 x 89) with adjustable neck strap & waist ties - Deanna Roberts Studio Cameron Tradie Split-leg Apron (79 x 89) with adjustable neck strap & waist ties
    Rated 5 out of 5
    by Spud
  • Seabed Split-leg apron 76 x 88 with adjustable neck strap - Deanna Roberts Studio Seabed Split-leg apron 76 x 88 with adjustable neck strap
    Rated 5 out of 5
    by Donna B.
  • Watermelon Split-leg apron 76 x 88 with adjustable neck strap & waist ties - Deanna Roberts Studio Watermelon Split-leg apron 76 x 88 with adjustable neck strap & waist ties
    Rated 5 out of 5
    by Victoria K.

From the Journal

Pottery supplies in Australia - Deanna Roberts Studio

Where to find pottery supplies in Australia

By Deanna Roberts

Mixing-plaster-Deanna-Roberts-Studio

How to mix plaster and make a mold

By Deanna Roberts

Deanna Roberts Studio Split-Leg aprons

Why everyone should own a split-leg apron

By Deanna Roberts

  • Privacy Policy | Terms & Conditions
  • Purchase, Delivery & Returns Policy
  • Orders

Copyright ©2019 · Deanna Roberts . All Rights Reserved

×

Log In

Forgot Password?

Not registered yet? Create an Account

Get more for your money! Free shipping on orders over $80 (Australia only) Dismiss